Field B13 Map
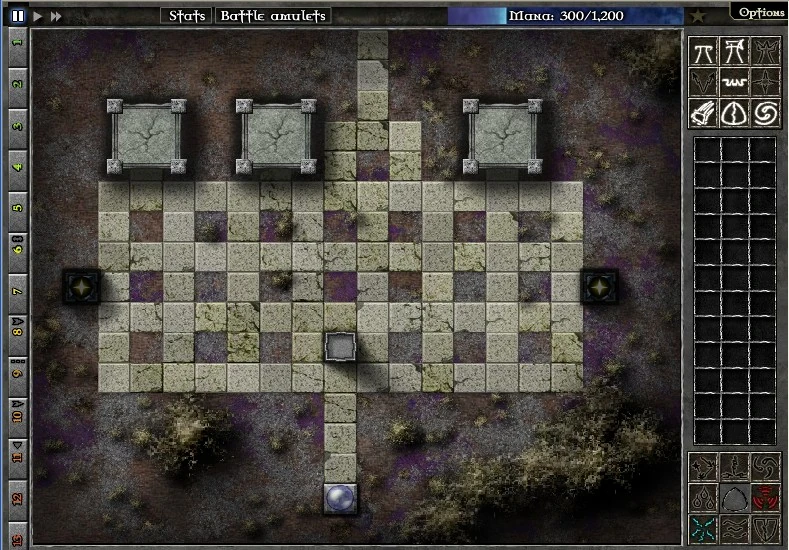
Field B13 is available after completing Field B12 in Gemcraft Labyrinth. This level can be a difficult level, unless you put walls in the proper place. Once the monster nests are destroyed, there is only a one way path to your orb. There are 14 waves in this level. The gem types available in this level are Shock and Bloodbound.
Starting Out[]
On the Field[]
- 1 Tower
- 1 Magic Orb
- 2 Lightning Shrines
Enemy[]
- 3 Monster Nest (1,174 HP)
Waves[]
| Wave # | Monsters | Hit Points | Armor Level | Speed | Mana per kill |
| 1 | 9 | 8 | 0 | 2 | 13 |
| 2 | 14 | 9 | 0 | 2.2 | 9 |
| 3 | 8 | 11 | 0 | 1.3 | 17 |
| 4 | 13 | 13 | 0 | 2.1 | 11 |
| 5 | 10 | 16 | 0 | 2.3 | 15 |
| 6 | 4 Giant | 270 | 3 | .6 | 56 |
| 7 | 9 | 22 | 1 | 2.1 | 19 |
| 8 | 15 Runner | 20 | 1 | 4 | 12 |
| 9 | 53 Swarm | 10 | 1 | 2 | 2 |
| 10 | 11 Runner | 28 | 1 | 4 | 17 |
| 11 | 11 Armored | 58 | 7 | 1 | 18 |
| 12 | 16 | 49 | 1 | 2.2 | 13 |
| 13 | 8 | 58 | 2 | 1.8 | 27 |
| 14 | 11 Armored | 96 | 10 | 1 | 20 |
Conclusion[]
No fields are unlocked after you defeat Field B13
Wild Gem[]
The wild gem type in this level is green-cyan-lime.