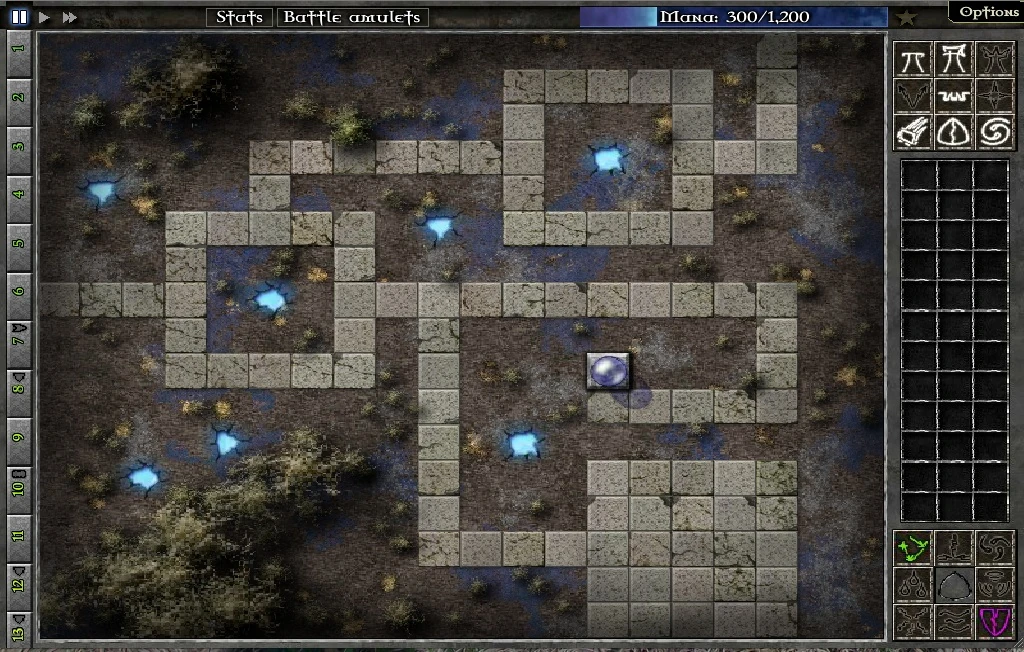
Field B5 Map
Field B5 is available after completing Field B4 in Gemcraft Labyrinth. There are 42 waves in this field. The gem types available are Chain Hit and Armor Tearing.
Starting Out
On the Field
- 1 Mana Shard (2,600 Mana)
- 1 Mana Shard (2,900 Mana)
- 3 Mana Shards (3,000 Mana)
- 1 Mana Shard (3,100 Mana)
- 1 Mana Shard (3,200 Mana)
- 1 Magic Orb
Enemy
There are no enemy structures on this field.
Waves
| Wave # | Monsters | Hit Points | Armor Level | Speed | Mana per kill |
| 1 | 15 | 85 | 0 | 1.7 | 8 |
| 2 | 10 | 92 | 0 | 1.8 | 13 |
| 3 | 10 | 101 | 0 | 1.4 | 14 |
| 4 | 14 | 109 | 0 | 1.9 | 10 |
| 5 | 11 | 119 | 0 | 1.9 | 14 |
| 6 | 9 | 130 | 0 | 2 | 18 |
| 7 | 8 Runner | 112 | 0 | 4 | 21 |
| 8 | 9 Armored | 214 | 7 | 1 | 19 |
| 9 | 14 | 167 | 1 | 1.8 | 13 |
| 10 | 2 Giant | 5,460 | 4 | .6 | 133 |
| 11 | 14 | 198 | 1 | 2.2 | 14 |
| 12 | 16 Armored | 301 | 10 | 1 | 13 |
| 13 | 16 Armored | 327 | 10 | 1 | 13 |
| 14 | 16 | 254 | 2 | 1.6 | 14 |
| 15 | 13 | 277 | 2 | 1.7 | 18 |
| 16 | 43 Swarm | 105 | 2 | 3 | 3 |
| 17 | 11 | 328 | 2 | 1.9 | 22 |
| 18 | 2 Giant | 10,710 | 6 | .6 | 177 |
| 19 | 44 Swarm | 135 | 2 | 3 | 3 |
| 20 | 12 | 422 | 2 | 1.9 | 22 |
| 21 | 14 Armored | 642 | 13 | 1 | 20 |
| 22 | 10 Armored | 700 | 10 | 1 | 28 |
| 23 | 40 Swarm | 190 | 2 | 3 | 4 |
| 24 | 8 | 591 | 2 | 2 | 37 |
| 25 | 15 | 643 | 4 | 2 | 20 |
| 26 | 12 | 700 | 4 | 1.5 | 26 |
| 27 | 15 Runner | 609 | 3 | 3 | 22 |
| 28 | 8 | 829 | 5 | 1.4 | 41 |
| 29 | 8 Runner | 721 | 3 | 4 | 42 |
| 30 | 13 Runner | 784 | 5 | 4 | 27 |
| 31 | 9 | 1,067 | 4 | 2.3 | 39 |
| 32 | 10 Armored | 1,625 | 19 | 1 | 36 |
| 33 | 14 | 1,263 | 4 | 2.1 | 26 |
| 34 | 8 | 1,375 | 6 | 2.3 | 47 |
| 35 | 15 | 1,496 | 4 | 1.7 | 26 |
| 36 | 13 | 1,627 | 6 | 1.5 | 30 |
| 37 | 16 | 1,770 | 5 | 1.8 | 25 |
| 38 | 16 | 1,926 | 4 | 1.8 | 26 |
| 39 | 58 Swarm | 733 | 5 | 3 | 4 |
| 40 | 14 | 2,280 | 4 | 1.7 | 30 |
| 41 | 50 Swarm | 868 | 6 | 3 | 4 |
| 42 | 10 | 2,699 | 8 | 2.2 | 44 |
Conclusion
After you defeat Field B5, your path continues toward Field B6 and Field A5.
Wild Gem
The Wild Gem type in this level is purple-orange-blue.