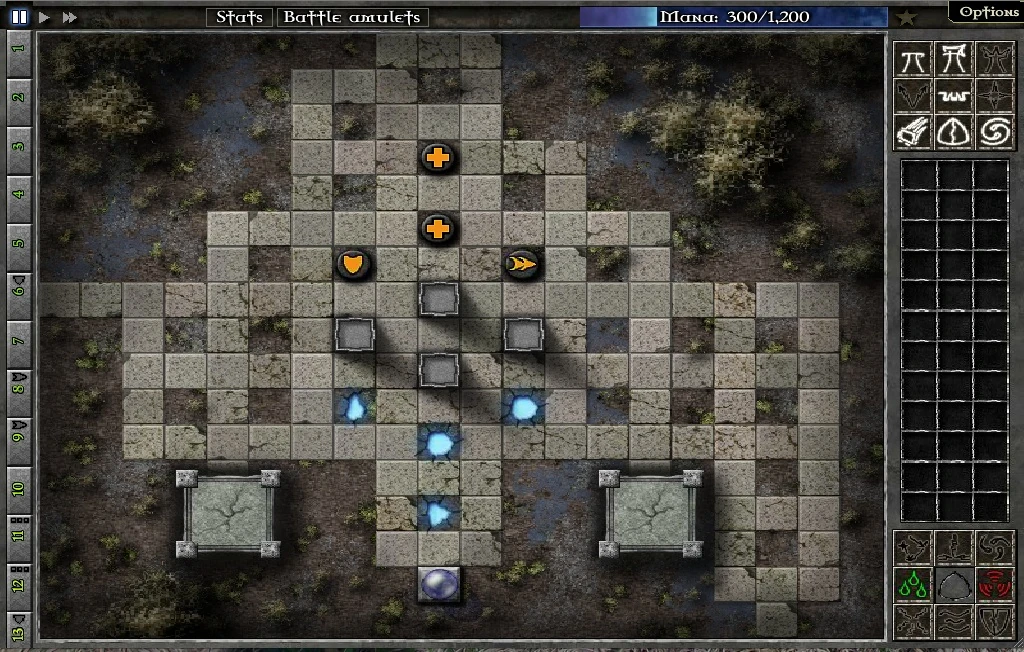
Field B4 Map
Field B4 is available after completing Field B3 in Gemcraft Labyrinth. There are 42 waves in this battle. The Gem types available are Poison and Bloodbound.
Starting Out[]
On the Field[]
- 4 Towers
- 4 Mana Shards (1,200 Mana each)
- 1 Magic Orb
Enemy[]
- 2 Monster Nests (5,032 HP each)
- 2 Healer Beacons (1,157 HP each)
- 1 Shield Beacon (1,157 HP)
- 1 Speed Beacon (1,157 HP)
Waves[]
| Wave # | Monsters | Hit Points | Armor Level | Speed | Mana per kill |
| 1 | 11 | 88 | 0 | 1.8 | 11 |
| 2 | 12 | 96 | 0 | 1.4 | 11 |
| 3 | 8 | 104 | 0 | 1.4 | 17 |
| 4 | 13 | 113 | 0 | 1.7 | 11 |
| 5 | 13 | 123 | 0 | 2.2 | 12 |
| 6 | 13 Armored | 187 | 4 | 1 | 12 |
| 7 | 11 | 146 | 1 | 1.7 | 15 |
| 8 | 16 Runner | 127 | 1 | 3 | 11 |
| 9 | 12 Runner | 138 | 1 | 3 | 15 |
| 10 | 8 | 188 | 1 | 2 | 24 |
| 11 | 57 Swarm | 71 | 1 | 3 | 2 |
| 12 | 59 Swarm | 78 | 2 | 3 | 2 |
| 13 | 14 Armored | 338 | 7 | 1 | 15 |
| 14 | 10 Armored | 368 | 10 | 1 | 22 |
| 15 | 11 | 287 | 2 | 2.2 | 21 |
| 16 | 12 | 312 | 1 | 1.7 | 20 |
| 17 | 13 Armored | 474 | 13 | 1 | 19 |
| 18 | 14 | 369 | 2 | 1.4 | 18 |
| 19 | 45 Swarm | 140 | 2 | 2 | 3 |
| 20 | 42 Swarm | 152 | 2 | 3 | 3 |
| 21 | 10 | 475 | 3 | 1.4 | 28 |
| 22 | 16 Runner | 413 | 3 | 4 | 18 |
| 23 | 15 Runner | 450 | 3 | 4 | 19 |
| 24 | 13 Armored | 856 | 16 | 1 | 23 |
| 25 | 14 | 666 | 3 | 2.1 | 22 |
| 26 | 9 | 725 | 4 | 2.1 | 35 |
| 27 | 8 | 789 | 4 | 1.6 | 40 |
| 28 | 8 Runner | 686 | 4 | 4 | 41 |
| 29 | 12 | 933 | 4 | 1.3 | 28 |
| 30 | 13 | 1,016 | 4 | 2.2 | 27 |
| 31 | 16 | 1,105 | 5 | 1.8 | 22 |
| 32 | 11 | 1,202 | 6 | 2 | 33 |
| 33 | 14 Runner | 1,046 | 5 | 3 | 26 |
| 34 | 16 | 1,423 | 4 | 2.1 | 24 |
| 35 | 11 | 1,548 | 6 | 1.6 | 35 |
| 36 | 9 | 1,685 | 6 | 2.1 | 44 |
| 37 | 11 | 1,833 | 5 | 1.7 | 36 |
| 38 | 12 Armored | 2,791 | 25 | 1 | 34 |
| 39 | 16 | 2,170 | 5 | 1.9 | 26 |
| 40 | 11 Armored | 3,305 | 22 | 1 | 39 |
| 41 | 15 | 2,568 | 6 | 2.3 | 29 |
| 42 | 15 | 2,794 | 7 | 2.2 | 29 |
Conclusion[]
After you defeat Field B4, your path continues toward Field B5 and Field A4.
Wild Gem[]
The Wild Gem type in this battle is purple-orange-blue.