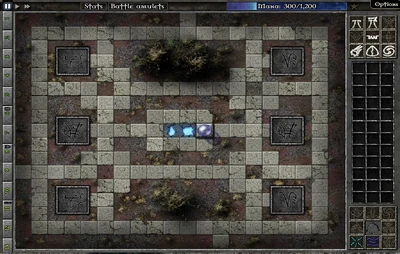
Field D6 Map
Field D6 is available after completing Field D5 in Gemcraft Labyrinth. There are 40 waves in this field. The gem types available are Shock and Slow.
Starting Out[]
On the Field[]
- 1 Mana Shard (850 Mana)
- 1 Mana Shard (1,850 Mana)
- 1 Magic Orb
Enemy[]
- 2 Tombs (90 Armor, 9,000 HP)
- 2 Tombs (120 Armor, 11,000 HP)
- 2 Tombs (150 Armor, 13,000 HP)
Waves[]
| Wave # | Monsters | Hit Points | Armor Level | Speed | Mana per kill |
| 1 | 11 | 102 | 0 | 1.4 | 11 |
| 2 | 9 | 111 | 0 | 1.5 | 14 |
| 3 | 11 | 121 | 0 | 1.6 | 12 |
| 4 | 14 | 131 | 0 | 1.6 | 10 |
| 5 | 16 | 143 | 0 | 1.9 | 9 |
| 6 | 4 Giant | 2,340 | 3 | .6 | 56 |
| 7 | 15 | 169 | 0 | 2.2 | 11 |
| 8 | 11 Runner | 147 | 1 | 4 | 16 |
| 9 | 14 | 200 | 1 | 1.4 | 13 |
| 10 | 14 | 218 | 1 | 1.9 | 14 |
| 11 | 52 Swarm | 82 | 1 | 2 | 2 |
| 12 | 9 | 258 | 1 | 1.4 | 23 |
| 13 | 11 | 281 | 1 | 1.5 | 19 |
| 14 | 9 | 305 | 1 | 2.3 | 25 |
| 15 | 10 Armored | 464 | 10 | 1 | 23 |
| 16 | 3 Giant | 7,220 | 6 | .6 | 111 |
| 17 | 10 | 393 | 2 | 2 | 24 |
| 18 | 13 | 428 | 2 | 1.7 | 19 |
| 19 | 16 | 466 | 3 | 2.2 | 16 |
| 20 | 10 | 506 | 2 | 2 | 27 |
| 21 | 10 Runner | 440 | 3 | 4 | 28 |
| 22 | 13 Armored | 840 | 10 | 1 | 22 |
| 23 | 2 Giant | 19,560 | 8 | .6 | 204 |
| 24 | 49 Swarm | 248 | 3 | 3 | 3 |
| 25 | 16 Runner | 617 | 3 | 3 | 19 |
| 26 | 12 Runner | 672 | 4 | 3 | 26 |
| 27 | 13 | 914 | 4 | 2.2 | 25 |
| 28 | 43 Swarm | 347 | 3 | 3 | 4 |
| 29 | 11 Armored | 1,514 | 19 | 1 | 31 |
| 30 | 16 Armored | 1,647 | 16 | 1 | 22 |
| 31 | 9 | 1,281 | 4 | 1.5 | 39 |
| 32 | 8 | 1,393 | 5 | 1.6 | 45 |
| 33 | 12 Armored | 2,122 | 22 | 1 | 31 |
| 34 | 9 | 1,650 | 5 | 1.7 | 42 |
| 35 | 11 Armored | 2,513 | 16 | 1 | 35 |
| 36 | 14 | 1,953 | 5 | 1.7 | 28 |
| 37 | 15 | 2,124 | 5 | 2 | 27 |
| 38 | 10 Armored | 3,235 | 19 | 1 | 41 |
| 39 | 8 | 2,515 | 5 | 1.6 | 52 |
| 40 | 2 Giant | 82,080 | 10 | .6 | 297 |
Conclusion[]
After you defeat Field D6, your path continues toward Field C6 and Field D7.
Wild Gem[]
The wild gem type for this level is Orange-Purple-Cyan.